
Accueil > ressources > SPAT Revolution - FLUX > Modèle de projet REAPER
 Modèle de projet REAPER
Mise en place d’un projet SPAT Revolution multi-catégories
Article written by Hugo Larin and Jean-Loup Pecquais (2023-09-12)
DOWNLOAD Reaper project -> Mixage Fou - Reaper bank12 for SPAT.rpp
DOWNLOAD SPAT Revolution project -> Mixage Fou - SPAT Template.json
1 Introduction
Hi and greetings to this little tutorial. Because FLUX: : Immersive has partnered with Mixage Fou for this year’s edition, we have provided all competitors with SPAT Revolution Ultimate licences and a template to make the discovery of SPAT Revolution easy.
This year, there are five different mixing categories :
• Stereo
• Binaural
• Higher Order Ambisonic (HOA)
• Open Channels
• and Dolby Atmos
The SPAT session template contains four possible deliverable formats, collectively referred to as ‘ROOM,’ which can be used as needed. Activating all of them simultaneously can result in a significant CPU load and, more importantly, lead to duplicate bussing. Please exercise caution in their use.
By default, the binaural room stream is unmuted (activated) and ready for mixing and monitoring.
This setup serves as a starting point for your project, and there’s nothing preventing you from opting for an alternate deliverable format later on. For instance, you may choose to enable the multichannel 9.1.6 room by unmuting it. At this stage, it’s advisable to disable (mute) at least the binaural room format. Rest assured, you can still monitor in this format by virtualizing your 9.1.6 system, thanks to the binaural monitor that’s already configured in the SPAT Revolution session. The signal will return to your Reaper environment (from SPAT binaural track) on the same bus as the binaural room.
The same principle applies when working with ambisonic (pre-configured 3rd order). You can focus on mixing for this specific format by muting all room formats except the ambisonic. The signal returned to your Reaper will consist of the actual HOA stream, the transcoded version to a 9.1.6 arrangement, and binaural monitoring (virtualizing your arrangement). Each of these will return to their respective return tracks in Reaper (HOA from SPAT, 9.1.6 from SPAT, and Binaural from SPAT).
It’s important to note that the source objects and soundscape you’ve been working on are linked to all room formats, so there’s no need for anything other than activating the desired format.
Want to obtain your SPAT Revolution license ? , Simply fill out the form Mixage Fou SPAT NFR License Request 2023
2 REAPER Session Structure
As a common ground for all participants, we used REAPER as the audio editor/processor in front of SPAT Revolution. The idea is that you can have all the tools provided in a generic DAW (editing, FX, mixing, etc.) and send the different tracks to SPAT Revolution to create an immersive sound scene.
The audio transmission between REAPER and SPAT Revolution is tackled by the SPAT send & return plug-ins. The technology is developed by FLUX: : Immersive and is called local audio path.
Inside the REAPER session, you will find three distinct sections. The first one is filled with tracks hosting the actual sound you can use for your creation. This is where you can create tracks, put FX, edit audio, etc.
Then, there is an “object” section, which has 24 mono objects and 8 stereo ones. These tracks send the audio to SPAT Revolution as sources, which can be then moved in a virtual space. So, the idea is that you create sends between the first sections of the mixer to these “object tracks” to make the audio go through SPAT Revolution. You can, of course, add or remove object tracks. For that we HIGHLY recommend that you read our user guide, and more specifically, the section about local audio path.
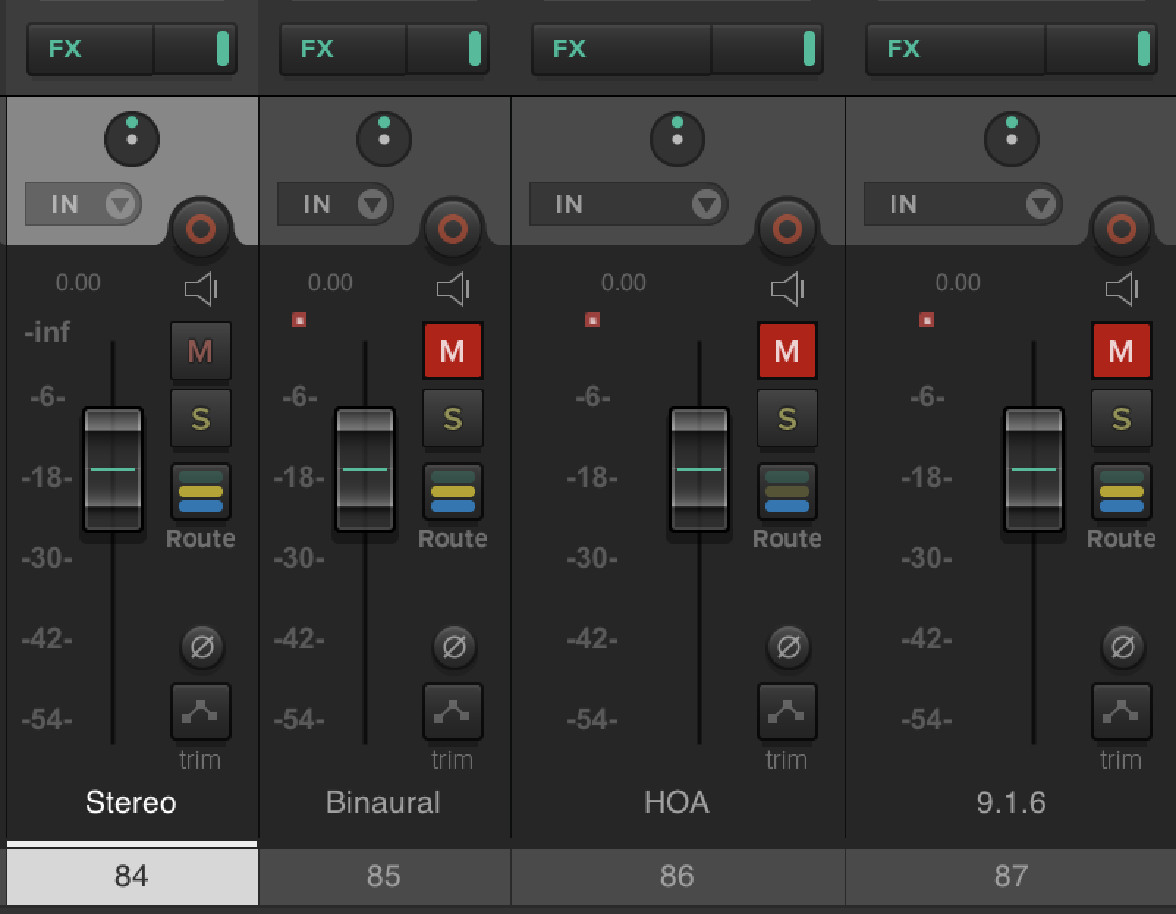
Last, there is the “Return Section”. Here, you will be able to record & monitor the audio back from SPAT. There is several return bus, corresponding to the different mixing format.
3 Setup Your REAPER Application
To make sure everything works as intended, there are a couple of things to check out within the REAPER preferences. First, you have to make sure that REAPER, SPAT Revolution and your audio interface share the same sample rate and the same block size (or buffer size). Next, you can refer to this section of our user guide to optimize REAPER with SPAT Revolution.
4 SPAT Revolution template structure
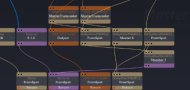
Inside SPAT Revolution, the setup page is where you can visualize what’s going on in terms of signal flow.

To get a better understanding of this semi-modular environment, please refer to this section of our user guide. In a nutshell, software input blocks connect audio streams from REAPER to SPAT. Then the source blocks are where you shift to an object-oriented paradigm. Sources associate audio channels with metadata that are interpreted by rooms to produce a mix. Masters are simply gain staging blocks, while software output send back the audio to REAPER.
In this template, we have four rooms, corresponding to the different mixing categories :
• Stereo
• Binaural
• HOA 3rd Order
• 9.1.6 for the Open Channels category
It means that you can mix for a specific format, and then decide to change later if you want !
The mix is held by sources blocks, and not by the rooms.
4.1 Rendering in Stereo
To render your project in stereo, make sure to only unmute the stereo room (SPAT) and the stereo return track (REAPER) in the template sessions.

NOTE : Note that the stereo output targets the first two outputs of your audio interface.
By default, the room use a classic stereopan strategy. But you could change it to another pan type. For example, the XY and AB pan laws are very interesting.
• The XY pan law simulate a coincident pair of microphones
• The AB pan law simulate an ORTF pair of microphones
It can give you another flavour of stereo spatialization !
4.2 Rendering in binaural
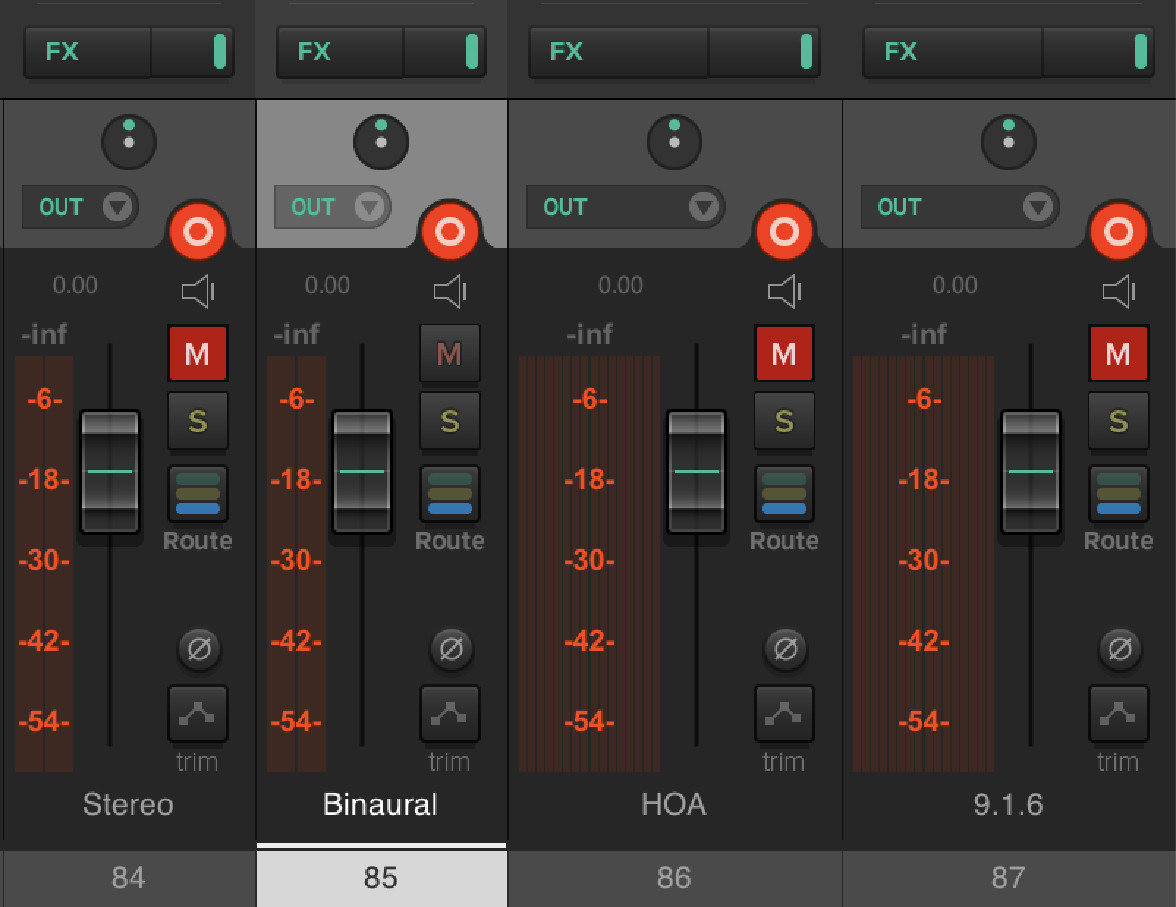
To render your project in binaural, you want to make sure that both the binaural room and the binaural return are unmuted, like shown below.

NOTE : Note that the binaural output targets the first two outputs of your audio interface.
By default, the room is set to use the spherical head model as the binaural pan law. This mode offers a very light way binaural render. It also has the advantage to not affect much of the timber of the sources. However, it comes at the cost of less spatial accuracy. If you prefer the traditional HRTF render, you can choose “Binaural” as the panning type, and choose your preferred HRTF in the list. There’s also a “Nearfield” mode than simulate the proximity effect of a source.
TIP : We generally recommend the Kemar or KU100 HRTF, but feel free to experiment !

4.3 Rendering and monitoring ambisonic
To render you project in ambisonic (HOA), make sure to unmute the HOA room and the HOA return.

NOTE : Notice that the HOA return has no hardware sends. You do not want to monitor this audio stream.
The SPAT Template decode the ambisonic room on a 9.1.6 arrangement. So you have, by default, two ways to monitor your ambisonic mix : either by monitoring it on a 9.1.6 speaker layout, or by listening to the binaural rendering of this 9.1.6.
So, to monitor your ambisonic mix, you can either unmute, in REAPER, the binaural return, or the 9.1.6 return.
That being said, nothing prevents you from changing the ambisonic decoding to suit your speaker layout. The same apply for the chosen ambisonic order.
From an archival perspective, having the largest ambisonic order guarantee a good decoding experience over a larger number of speaker layouts. Indeed, the more ambisonic channels you have, the more you can decode to numerous loudspeakers.
For more information about ambisonic decoding, please refer to this section of our user guide.
WARNING : If you choose an order greater than 3, don’t forget to increase the number of channels
on the HOA return track in REAPER !
To know how many channels we need for a given ambisonic order, we use these to formulas :
𝑐ℎ3𝐷 = (𝑁 + 1)2
𝑐ℎ2𝐷 = 2𝑁 + 1
Where 𝑐ℎ is the number of channels, and 𝑁 the ambisonic order.
4.4 Rendering and monitoring an open channel format
We have chosen to provide a 9.1.6. for the open channel format. This is one of the possible Dolby Atmos speaker arrangements, that can only be targeted by objects in the Atmos ecosystem.
To mix in this specific format, you will have to unmute the 9.1.6 room.

If you are lucky enough to be able to monitor directly a 9.1.6 setup, then you can unmute the 9.1.6 return track in REAPER.
NOTE : note that the 9.1.6 return track output audio on the first 16 channels of your audio interface.
Now, if you don’t have such a speaker system at your disposal, you can unmute the binaural return track in REAPER, and monitor the 9.1.6 audio stream over headphones !
IMPORTANT : Of course, as it is an open channel category, don’t feel limited or obliged by our default choice. You can configure your room so that it reflects any speaker configuration you want.
Changing the room output format
To change the room to another output format, simply select the room, then in the inspector on the right side of the window, choose the desired speaker setup in the “Speaker Arrangement” drop-down menu.

If the speaker layout you want is not present in the list, you can create one by clicking on the edit button, just aside the previous drop-down menu. Please, refer to our user guide for the good practice in speaker design using SPAT Revolution.
4.5 Rendering to Dolby Atmos
At this day, it is not possible to directly encode an object-based mix from SPAT Revolution to Dolby Atmos. However, because you have been provided with licences for the Dolby Atmos renderer and panner, you could use the 9.1.6 mix, explode it in 16 individual channels and feed 16 objects placed where the speakers should be !
TIP : We will provide a template for an easy conversion between channel-based to Dolby Atmos object mix format.
5 How do I make the sources in SPAT Revolution move ?
Of course, the fun part of integrating REAPER with SPAT Revolution is the whole creative part of source movement and trajectory. When we are using local audio path (LAP for short), then the automation data are sent inside the same pipe as the audio streams. In other words, you don’t have anything special to setup.
To enable the automation on a track in REAPER, right-click on the little automation button at
the bottom of the track, and choose the preferred mode.
Once it is done, simply move the sources that correspond to the SPAT Send plug-in of the
armed track. REAPER should write the movement on the timeline.
To playback the movement, choose any automation mode, other than write mode, and simply
launch the playback in REAPER.
IMPORTANT : If nothing is written in REAPER, be sure to activate the automation on the right tracks ! Because we are automating the sources of SPAT, we want to make sure that we are automating the tracks that host the SPAT sends plug-ins. If the problem persists, be sure to check that the “parameter notification automation” is correctly setup.
6 How do I print/record/bounce my mix ?
Because we are delegating the mixing to another app than REAPER, we cannot use any offline strategy to render our mix (anyway, you always listen to your final mix, don’t you ?)
Each return track in the template has been set up to record what comes from SPAT Revolution. When you are ready to record, simply unmute the room you want to render, and press the record button in REAPER.
CAUTION : You should not render multiple rooms at the same time, as the setup of the template my route different monitoring mix to the same return track.
Once the record is over, a file had been written next to your REAPER session file.